Showing posts with label Recipes. Show all posts

Wednesday, November 3, 2010

Taylor's Recipe Project: "Cinnamon Tortilla Yummies"

Everyone welcome my daughter, Taylor, as she guest posts today!  Her class was assigned a project requiring them to complete a recipe, document the recipe and take pictures. 

~~~~~~~~~~~

Cinnamon Tortilla Yummies
by Chef Taylor

Ingredients

8 Flour Tortillas
1 stick Butter, melted
4 Tbl Sugar
2 tsp Cinnamon


Directions

1.  Preheat oven to 375 degrees.

2.  Spread  melted butter on tortillas.


3.  Combine cinnamon and sugar in a bowl.


4.  Sprinkle mixture over tortillas.

5.  Using a pizza cutter, slice tortillas into 8 wedges each.

6.  Bake in oven 6 minutes or until crispy.


Enjoy your Cinnamon Tortilla Yummies! 


Empty Plate = Yummy Recipe


~~~~~~~~~~

Taylor loves being in the kitchen as much as I do!  Her recipe tastes great dipped in fruit salsa or my favorite --- used as an edible spoon for ice cream. 

Tuesday, August 24, 2010

Homemade Pizza Lunchables

Over summer break I was at the grocery store with the kids when Taylor starts pointing and doing the whole "can we get those? please!? I NEED them!" routine.  The girl was pointing at the Pizza Lunchables.  Now, I admit, I ate them when I was a kid and loved them.  As an adult, I think they are nasty. I get her point... they are fun and other kids at school have them.  However, the mom in me just can't get past the ingredient list though. 


So, we stood in front of the refrigerated case for a few minutes discussing what about it she liked and wanted.  (this is normal for us, we are total foodies and discuss everything ad nauseum)  Partway through this conversation she had a lightbulb moment.  "Can you make me HOMEMADE ones?"  Now that, little girl, I am ok with. 


Homeade Pizza Lunchables
makes 10 kits


Ingredients:


Pizza Dough of your choice (homemade, pillsbury, etc)
Pizza Sauce / leftover spaghetti sauce
Shredded Cheese
Toppings of choice


Directions:


1.  Make pizza dough according to directions and roll out onto a cookie sheet in large rectangle.  Bake according according to recipe's directions or until done. 

2.  Cool crust and cut into individual servings.  The number of servings you end up with will depend on the recipe you used and the size rectangle you made.  You know your kid.... cut into squares the size that they will eat.  

3.  Assembly:

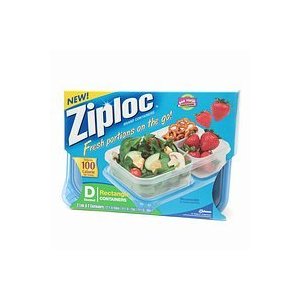
You can do this a couple of different ways.  What we like best is to use the ziploc divided containers:
I put the sauce and cheese into the smaller sections. The toppings go in the large section and then I lay the crust on top of the toppings.

You can also put everything into snack size bags or individual containers if you like.  Again, you know what works for your family when it comes to packaging and containers.  Do what makes your life easiest!

4.  Put all of your pizza kits in the freezer and pat yourself on the back!  You just put several ready-to-go lunches in the freezer. 

To serve:  thaw the night before and throw it in a lunch box.  Don't forget to pack a spoon to spread the sauce! 

Sunday, June 20, 2010

RECIPE REVIEW: Chicken-Bacon Stuffed Pizza Rolls

Oh. My. Goodness. RUN to your kitchen right now to make these!  I will be making several batches of different variations for the freezer.  They are definitely OAMC worthy. 


They are absolutely incredible! I used my own pizza dough recipe (I put italian seasoning and garlic in the dough) for these, but otherwise followed the directions exactly. Which, I have to say is rare for me. I almost always start with a recipe and then end with something completely different by the time I finish "tweaking" it.

To make these freezer-friendly, assemble as the recipe states and then freeze the dough balls on a cookie sheet.  Once frozen, transfer to a freezer bag.  They are time consuming to make, so doing several batches at once and freezing will save a whole lot of prep time when I'm ready to serve them. 

The kids have already put in requests for Ham & Pineapple, Pepperoni, Sausage, and I am thinking that a Mushroom/Onion/Muenster Cheese combo would be awesome. 

Now go make some of these pronto!  I guarantee any man in your life would enjoy some of these today, since it's Father's Day. 

Tuesday, April 20, 2010

"Brown" Rice the Gilbert Way

Growing up, my mom always made her family's "Brown Rice". Now, this is not actually brown rice. It is white rice baked into a state of deliciousness. There is nothing healthy about it, but it is truly comfort food at it's finest.


Brown Rice the Gilbert Way
makes a 9 x 13 casserole dish


Ingredients

1 cup converted rice, uncooked
2 tablespoons butter
1 can beef consomme
1 can beef broth
1 can sliced mushrooms
small onion, diced
splash of olive oil

Directions

1. Melt butter in casserole dish.
2. In a small skillet, saute the onion in a splash of olive oil until translucent.
3. Add rice, mushrooms, onions and liquids to casserole dish and stir.
3. Bake at 350 degrees for about an hour. 

Monday, March 29, 2010

Oh how I love French Bread Pizzas

The plan was to make Italian Beef Sandwiches tonight, but I decided to switch it up.  French Bread Pizzas were just what we needed!  In fact, we were so happy to be having them for dinner that we made them at 3:00, instead of waiting until the "normal" dinnertime.  And you know what?  We do that a LOT!  When it's just me and the kids home for dinner, we'll eat dinner around 3:30 when everyone gets home from work / school and then just have a snack around 6:00 before they start the whole bath/bedtime thing.  Reversing snack and dinner works just great for us. 

I'm sure everyone knows how to make French Bread Pizza, but in case you don't.... here's how we do it. 

French Bread Pizza

Ingredients

French Bread (we used french rolls, since we had planned to do sandwiches)
Pizza Sauce  (you can get a huge #10 can at Sam's for less than $2.50)
Cheeses
Italian Seasoning
Toppings of your choice


Directions

1.  Preheat Oven to 375 degrees.

2.  Slice your bread the long way, like you would to make a sandwich. 

3.  Hand over the bread to each family member to make their own.  (I LOVE dinners like this!)

4.  Everyone can spread sauce, cheeses, seasoning, toppings to their liking.  Once they've loaded up their pizzas, plop them all on a baking sheet and toss into the oven for about 12 minutes, or until hot and bubbly. 

Enjoy!
See that one with huge chunks of pineapple?  That's Taylor's.  :)

Tater Tot making her pizza

Mr. Mudpie pouting on the couch.  He thought when I said "come to the table!" that dinner was already done.  haha!!  Apparently make-your-own is not his thing.

TJ waiting for his to be done


Sorry, there are no pictures of the finished pizzas.  Oops!  We were all really hungry and I didn't think to take a picture until it was too late. 


Friday, March 19, 2010

Effortless Pot Roast

By request, here is my favorite Pot Roast recipe for the crock pot.  I haven't made this in a while... I'll have to make it next time roasts go on sale!


Effortless Pot Roast


Ingredients


2 (10 3/4 ounce) cans condensed cream of mushroom soup
1 (1 ounce) package dry onion soup mix
1 1/4 cups water
5 - 6 lb pot roast

*** If you have a small family and only want to do a 2 - 3 lb roast, just use 1 can of soup, 3/4 cup water and the onion soup packet.  Although, I don't know why anyone would cook a 3 lb roast, when they could cook a 6 lb roast in the same amount of time.  Leftovers can be frozen and are awesome used instead of ground beef in some tacos the next day.  But then, I've said before that I'm a cook-in-big-batches kind of girl. 


Directions


1.  In a bowl, mix cream of mushroom soup, dry onion soup mix and water.

2.  Place pot roast in slow cooker and coat with soup mixture.

3.  Cook on Low setting for 8 to 9 hours - the longer the better. 

If you like a thick gravy, you can thicken the juices with a little cornstarch/water mixture right before serving. 

Thursday, March 18, 2010

Crock Pot Taco Soup (Just for you Lara!)

I don't know about the rest of you, but I *heart* my crock pot.  It gets used and abused a lot around here.  Today, the crock pot was kind enough to cook a pork roast for me so that I could turn it into Cuban Sandwiches. 

At 5:00 I arrived home to a cranky husband and two hungry kiddos.  Because I had taken 5 minutes earlier in the day to load the crock pot, I had homemade Cuban Sandwiches on the table within 15 minutes of arriving home.  (It would have only taken 10, but there were a couple meltdowns and one poop incident.)  And as a bonus.... I have leftover pork for tomorrow night!

One of my favorite crock pot soups to make is Taco Soup.  Quick, easy and cheap.  And if that's not good enough -- it freezes great.  Freeze any leftovers in individual servings for when you need a quick lunch or hearty snack. 


***** This is one of those meals that I consider a "pantry meal", meaning I almost always have all of these ingredients in my pantry.  Having about a dozen pantry meal recipes at the ready is crucial for every home kitchen.  You never know when you might get sick and not want to shop, have a sudden pay loss, or even a natural disaster.  This meal could easily be made over a camp stove (just omit the perishable garnishes).  As someone who grew up in the land of hurricanes, it is a survival instinct to have food on hand to feed my family in any situtation.  I'll step off my soapbox now.  :)


TJ's Favorite Crock Pot Taco Soup
Serves 8

Ingredients


1 can pinto beans
1 can white beans or kidney beans
1 can yellow corn
1 can Rotel tomatoes & chilies (I like the one with lime)
1 big (28 ounce) can diced tomatoes ** in the summer time, dice up a few overripe tomatoes from the garden
1 (4 ounce) can diced green chilies
1 packet taco seasoning mix
1 packet hidden valley ranch dressing mix
1 lb shredded chicken, ground beef or any meat you have hanging out in the fridge

handful of chopped cilantro
handful of chopped green onions


*** Optional Garnishes:  tortilla chips, shredded cheese, sour cream, salsa, avocados, guacamole, etc.

Directions

1.  Cook meat and drain, if not using leftovers from fridge.

2.  Add all ingredients to crock pot except cilantro and green onions.  Do NOT drain cans of veggies.  Just open the cans and dump the entire contents of cans into the crock pot. 

3.  Stir it & cover it.

4.  Cook on low for 4 hours, or high for 2 hours. 
     Do NOT take the lid off!  Every time you take the lid off, it takes up to 30 mintues for the crock-pot to resume the temperature.

5.  If it's done before dinner, keep it on Warm or Low until serving time. 

6.  When ready to serve, add in cilantro and green onions.  yummy!  Let everyone add whatever garnishes they like to their bowls, and enjoy.  :) 

Sunday, March 14, 2010

Broccoli Cheese Rice Casserole (with OAMC directions!)

This is one of those great standby recipes that you can throw together in a pinch.  Or even better, keep one assembled in the freezer, so all you do is throw it in the oven!  The best part is it doesn't contain any Velveeta or Cheese Whiz type fake cheeses.  I don't know about you, but those "cheese" products scare me. 

I usually add chicken to mine so I can make it a one-dish dinner.   But it's great as a side dish too!


Broccoli Cheese Rice Casserole
serves about 6

hmmm.... this is one of those not-so-pretty recipes.  it tastes great though!


Ingredients


2 (10 ounce) boxes frozen chopped broccoli, thawed
2 cups cooked rice (I use brown rice, but white is fine too)
8 ounces shredded cheddar or colby jack cheese
2 (10 3/4 ounce) cans cream of whatever soup
1 small onion, chopped
olive oil


Directions

1.  Cook onion in a little bit of olive oil in skillet until done.

2.  In a greased casserole dish, add all ingredients and mix well. 

3.  Bake at 350 for 1 hour or until hot and bubbly.


To make ahead and freeze: Mix all ingredients together in a bowl (cooked rice, not raw) and spoon into one or two casserole dishes, cover, label and freeze.
From frozen:  cook 1 hour and 10 minutes or so
Thawed:  cook for about an hour

Monday, January 25, 2010

Olive Garden Salad Dressing

It was a happy day last week when I finally found the recipe for the Olive Garden's salad dressing.  I combined a few recipes and tweaked them and have come up with what we consider the closest possible version without going to the actual restaurant. 

To make make my discovery even more heavenly, the next morning I found breadsticks at Sam's that are almost identical to Olive Garden's.  Yeah baby!  Now I realize that Olive Garden is not exactly the most authentic Italian food out there, and I lovingly think of it as "generic Italian".  However, it is some pretty delicious food! 

Coming soon..... the copycat recipe of their Stuffed Mushrooms.  Go ahead and wipe the drool off your face.  I did. 

Copycat Olive Garden Salad Dressing
~ Serves about 6 ~


Ingredients

  1/3 cup white wine vinegar
  1/3 cup water
  1/3 cup vegetable oil
  1/4 cup corn syrup
  2 1/2 tablespoons shredded romano cheese 
  2 tablespoons dry pectin
  2 tablespoons Egg Beaters egg substitute
  1 1/4 teaspoons salt
  1 teaspoon lemon juice
  1 teaspoon minced garlic
  1 teaspoon italian seasoning blend (I use the one from Whole Foods) 
  1 pinch dried oregano
  1 pinch crushed red pepper flakes

Directions


Put all ingredients into a mason jar and shake like crazy for about at least one minute.  Refrigerate for at least 1 hour prior to serving.  Shake again right before using, to distribute the cheese again.

Tip for Serving
When you get ready to serve, the best thing to do is pour your dressing in the bottom of your salad bowl, then add in your salad ingredients.  You can then put the whole bowl into the fridge until serving time.  When you're ready to eat, use your salad tongs to turn the salad mix a few times and coat in dressing.  Voila!  Restaurant Salad on the cheap!

Enjoy!

Monday, January 11, 2010

Steel Cut Oats - the easy way!

I grew up eating oatmeal packets with all of the great flavors.  I still love those, but have recently discovered Steel Cut Oats.  Hellllooooo yumminess!  They are so much heartier than the powdered mush of the packets, plus they keep you full for so much longer.  The drawback to them is they take forever to cook and I am so not a morning person.   My trusty crockpot has come to the rescue though!  I've mastered cooking them in the crockpot overnight so that I can wake up to a hot, delicious and nutritious breakfast.  And the best part of the cooking process ---- no baked on mess in the crockpot!  The mess is all contained in the serving bowl.  Oh, it just doesn't get any better than that!

Overnight Crockpot Steel Cut Oats

Serves 4 - 6 generous servings
Leftovers are great reheated in the microwave!

Ingredients:

1 cup Steel Cut Oats
4 cups Water  (plus more for water bath)
pinch of Salt
~ plus any flavorings you like ~


Directions:

1.  Combine Steel Cut Oats, 4 cups Water, and a pinch of Salt in a bowl that will fit inside your crockpot.

2.  Set this bowl into your crockpot and *carefully* add water into the crockpot around the bowl, creating a water bath.  Make sure you don't get extra water into your smaller bowl!  You want the water line to be about level with the water line inside the smaller bowl.


3.  Cook on low overnight.  When you wake up, you will have creamy, yummy oats waiting for you to de-healthify them!  And as a bonus, your crockpot is clean!  Just pour out the water and dry it off. 


4.  The Fun Part!  Add your favorite flavors.  Some of mine are: 
  • brown sugar, melted butter, cinnamon
  • diced apples, cinnamon, ginger
  • pumpkin puree, pumpkin pie spice  (oh so good!)
  • apple butter, pecan pieces
  • blueberries, cinnamon, ginger

You can substitute some of the water for milk if you like.  I usually just add a splash of milk to my bowl to thin it out a little in the morning.  It helps cool it off so I can eat it faster, too!  :)

Sunday, January 10, 2010

My Mama's Beer Bread

This bread is total comfort food and reminds me of my mom every time I make it.  She has made this bread since we were babies, and we always knew the second we walked in the door if she was making it.  The smell is mouthwatering and will forever be imprinted in my brain, associated with my mom.    It is soooo yummy and incredibly simple to make.   

  
Denise's Beer Bread


 Ingredients

 
3 cups Self Rising Flour
3 tablespoons Sugar
12 oz Beer 
1/2 stick Butter, melted


 Directions


1.  Preheat oven to 375 degrees and grease your loaf pan.

2.  Baking Tip:  Sift your flour before measuring (yes, it really does make a difference!) If you don't have a sifter, use a wisk or fork to stir up the flour in your canister really well.  Then use a spoon to scoop it into your measuring cup.  

3.  In mixing bowl combine Flour and Sugar, then add Beer.  Stir well until all ingredients are incorporated.


4.  Pour batter into greased loaf pan and then pour the melted butter over the top of the batter.  yum!!!


5.  Bake for 45 minutes to an hour until golden brown on top and it sounds hollow when you thump it. 


You can also make it in muffin tins, but I really prefer it as a loaf.   

 
Here's a pic of my mom and the doodle bug.  This was taken on Halloween 2009, when we went thrifting and made the scarves.  I love my mom.  :) 


It's Cooking Time!

Get ready folks.... you are going to be seeing a trend of bulk cooking posts on my little blog in the coming months.  We are trying to use all of the stuff in our freezers, which means we will be filling them back up soon!  Food is one of my main passions in life, so the thought of some major cooking makes me all giddy and school girl-ish!

I am a huge fan of bulk cooking (aka OAMC "once a month cooking").  There are tons of people who do actual Once A Month Cooking, where they spend two days cooking 30 meals.  However, I tend to approach it a little differently.  This is mainly because I don't like the taste of most foods that have been cooked, frozen and reheated.  I do however LOVE to prep a ton of food and throw it in the freezer so that it is ready to go on the day I need it.  This is a HUGE timesaver at dinnertime. 

My typical method is to attack bulk cooking by meat types.  When ground beef goes on sale, I buy around 30 lbs.  When whole chickens go on sale for $0.69/lb or less, I buy 2 dozen --- yep, that's 24 chickens!  I also do Baking Days where I make a few batches of cookie dough and a few batches of muffins for the freezer.  Breakfast bulk cooking is also high on my list of favorites. 

Breakfast is my struggle meal of every single day.  TJ likes a full meal at breakfast and I am not a morning person, so I make huge batches of pancakes, muffins, french toast sticks, sausage biscuits, etc.  That way in the mornings, I microwave one of the frozen items and throw it at him.  He and I both find that our mornings go smoother when we have breakfast items in the freezer.  *** We have proven this method the past month, as we have run out of breakfast freezer items and have been going day-by-day.  It has gotten pretty ugly and I will be doing a breakfast session this week! ***

So stay tuned for some yummy recipes and time saving tips.  Make some room in your freezers!

Saturday, October 24, 2009

Nothing says Fall like Pumpkin Muffins!

After much begging and pleading from the oldest child, a batch of our favorite Pumpkin Muffins was made this evening. These are without a doubt the moistest muffins I have ever tasted. They just ooze the feeling of autumn!


Super Moist Pumpkin Muffins


Ingredients

1 can pure pumpkin (not the pie filling)
2 eggs, slightly beaten
1/4 cup water
1/2 cup oil
1 cup bread flour
3/4 cup whole wheat flour
1/4 teaspoon salt
1 1/2 cups sugar
1 teaspoon baking soda
1/4 teaspoon baking powder
1 teaspoon cinnamon
2 1/2 tsp pumpkin pie spice


Directions


  1. Preheat oven to 350 degrees and grease your muffin tins.
  2. In your mixer's bowl, wisk together the pumpkin, eggs, water, and oil.
  3. Add in the remaining ingredients, sifting as you add them. (I like to turn my mixer on the lowest speed and add the dry ingredients slowly so they don't fly all over the kitchen when I turn on the mixer.)
  4. Fill greased muffin tins about 3/4 full.
  5. Bake at 350 degrees about 30 minutes or until set when touched.

This batch makes 12 regular sized muffins and about 18 mini muffins. I add the mini muffins in about 15 minutes after the regular sized ones, and they all finish at the same time.

Now go put on some great cooking music, get a pot of coffee going and make some muffins. I promise you'll be glad you did!

Wednesday, October 21, 2009

Fish Tacos


It always helps to have a helper in the kitchen.... even if he is clad in Buzz Lightyear underwear (worn backwards, of course) OVER his diaper. Gotta love the fashion sense of a 2 year old!


*** Let me preface this recipe by saying that I am not a fan of measuring, which is probably why I suck at baking! Everything is done "to taste". So if you are the type of person who needs exact measurements, my way of cooking is not for you!***


Donna's Favorite Fish Tacos


My favorite quick & healthy meal


Ingredients:

Fish of choice (tonight we used flounder, but grouper or mahi mahi tastes best)
Tortillas
Broccoli Slaw - or - shredded Cole Slaw mix (broccoli slaw is our preferred choice)
Cilantro, 1/2 a bunch or so
Green Onion, chopped
1 tsp. Jalepenos, finely chopped
tablespoon or two of Mayonnaise
juice of 1 Lime
1/2 tsp or so of Cumin or Cumin Seeds
Salt & Pepper to taste
Tomatoes (garnish)


Directions:

  1. Make Slaw Dressing: Mix together Mayo, Lime Juice, Cumin, Salt & Pepper.

  2. Combine dressing above with Slaw shreds, Cilantro, Green Onions and Jalepeno. Let this hang out on the counter at room temperature while you cook the fish.
  3. Grill your fish until done, either outside on the grill or inside in a pan. Sprinkle on your favorite seasonings - blackening seasoning is great.

  4. While you've got the grill going, go ahead and warm your tortillas up.

  5. Assemble: Fill your tortillas up with the fish, hot off the grill, top with a generous mound of slaw and some diced tomatoes from the garden.

Yum! Now I know most people enjoy fish tacos with fried fish instead of grilled. However, grilling the fish saves a TON of calories, is waaaaay healthier for you, and in my opinion just plain tastes better. If you simply must have it fried, then save yourself some time and cleanup and throw in some baked fish sticks.

Enjoy!